 Skip to content
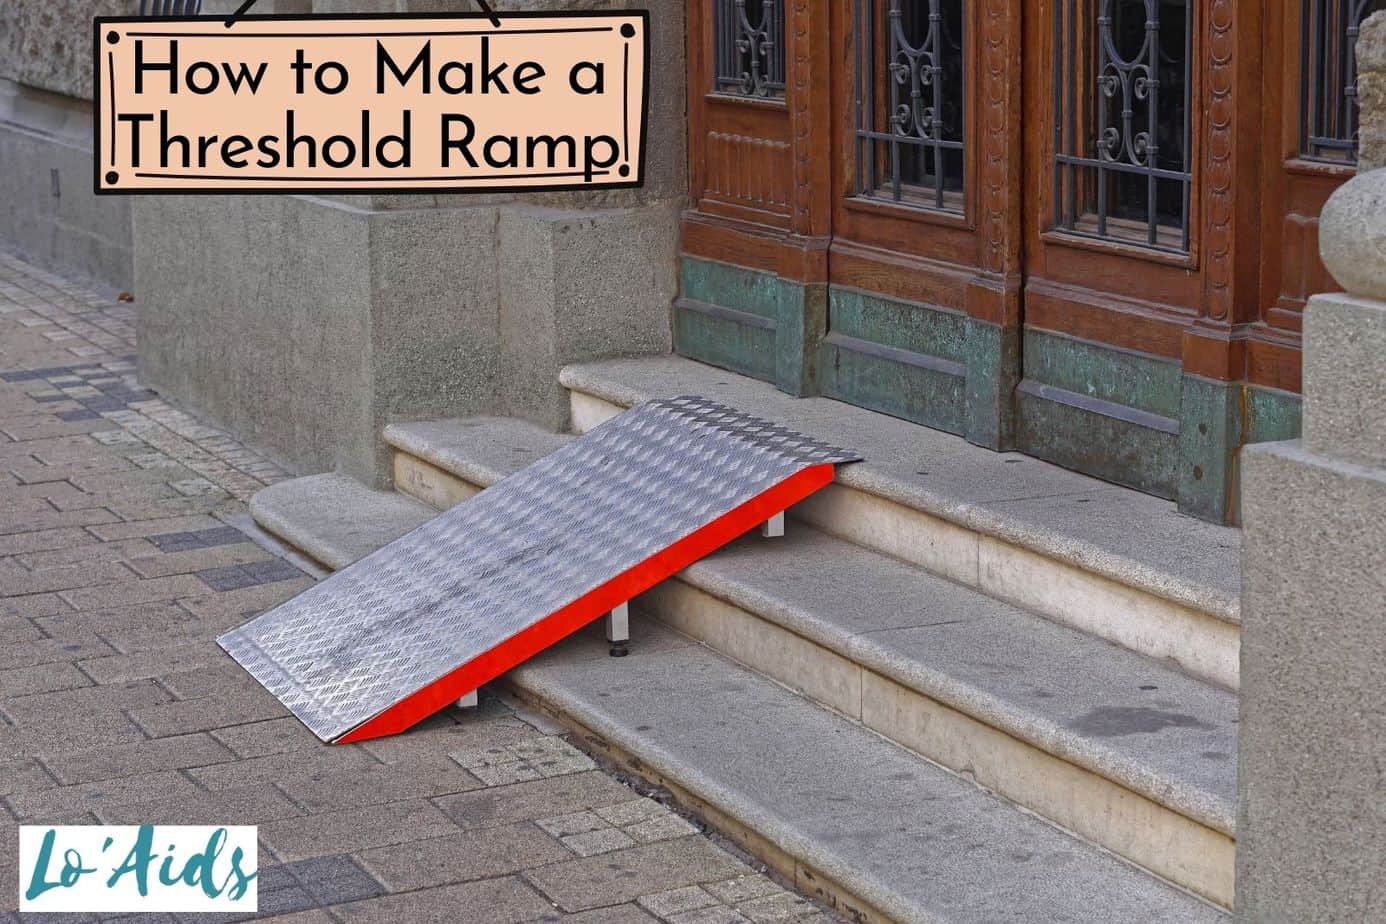
Wondering how to make a threshold ramp for a senior with mobility issues?
It’s actually not as hard as it sounds!
In fact, if you follow our guide below, you can pull it off in 5 easy steps with just a few basic supplies.
Just keep reading to see how!
READ MORE: Wheelchair Ramps for Cars
Table of Contents
Which Kinds of Wheelchair Ramps Are There?

Let’s very quickly go over the different types that you can build. We’ll keep it brief!
- Permanent and semi-permanent,
- Portable wheelchair ramp,
- Vehicle,
- Track ramps.
Permanent ramps are practical but bear in mind that some slopes, landings, and railings might require a specific height.
The question is if your wheelchair would fit some kind of permanent ramp.
Portable ramps are great, as you can carry it with you wherever you go.
However, be careful, as the portable ramps have to be installed properly in the desired place.
Unevenly placed portable ramps might result in slipping off the surface, which might cause an injury.
MUST READ: How Much Do Wheelchair Ramps Cost?
How to Make A DIY Threshold Ramp

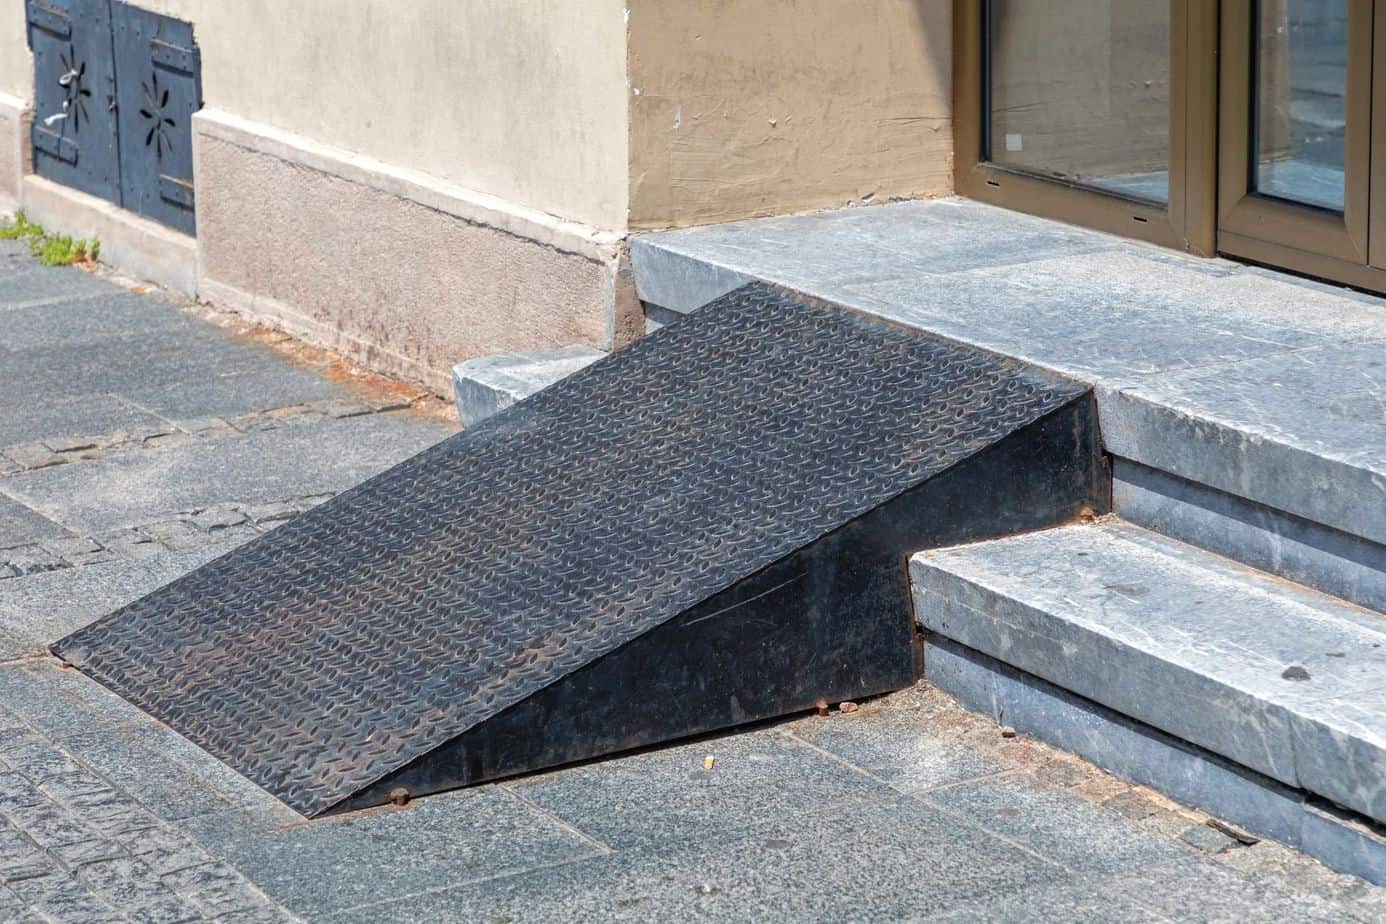
For people with mobility issues and seniors, getting in and out of the house is always a struggle. That’s where threshold ramps come in really handy!
While you can buy such a ramp at a store or online, making one means customizing it to fit the needs of the person who will be using it.
Plus, as promised above, it’s not really all that difficult. In fact, you can easily put one together on a Saturday morning!
Let’s start with some basics that you’ll need to know on how to make a threshold ramp before you start building one, then we’ll look at the steps.
How Do You Measure A Threshold Ramp?
When you are learning how to make a threshold ramp, one of the steps that you can’t afford to overlook is the size of the ramp.
When not done right, the doorway can be the most dangerous area for a senior or a person in a wheelchair.
Threshold ramps vary in width and height. Ultimately, you need to make a ramp that fits the size of the doorway.
You also need to consider the elevation, and the length plays a major role in that.
The wrong elevation increases a senior’s risk of tripping. which could lead to serious injuries.
At the same time, the wrong elevation can make it hard for an older adult using a walker or a person using a wheelchair to get around easily.
So, how do measure a threshold ramp so that you can make one that doesn’t act as a tripping hazard?
When measuring the threshold ramp, three things need to be considered: the rise, length, and width.
Step up your DIY game and learn how to build a sturdy ramp out of wood with our comprehensive article ‘How to Build a Ramp Out of Wood‘!
CHECK: How Long Should a Wheelchair Ramp Be for 2 Steps?
Measure the Rise
The first thing you need to take into consideration is the rise in terms of inches from the available walking surface, the step or landing surface where you intend to install the ramp.
Here, you must measure the rise at every end of the threshold. You want to do this in case there are any variations whereby one side ends up being higher than the other one.
If that’s the case, you can prepare to make a ramp that will accommodate the rise variations.
Check out the video below to learn more:
Measure the Width
The other measurement that you can’t ignore is the width especially when it comes to doorway thresholds for that smooth transition.
Most threshold ramps have widths of 32 to 36 inches, which works for most standard door openings.
However, measuring the width is vital since we are talking about your DIY threshold ramp.
Measure the Length
When it comes to threshold ramps, the higher the rise, the longer the ramp needs to be.
A threshold ramp extending about a foot onto the walking surface will do if the rise is about an inch or less.
If the rise goes higher than that, though, you will need about two inches for the gradual as well as safe incline of the threshold ramp.
But what happens if the walking surface extends to meet the landing at a specific angle?
When that the case, you will need to determine how much space there is towards the walking surface so that you can make a ramp that will fit into that space.
What is the Proper Slope For a Threshold Ramp?
When it comes to choosing the right threshold ramp especially a wheelchair ramp or a DIY doorway ramp for someone with mobility issues, the slope matters just as much as width and length.
Experts actually talk about two different slopes: residential unoccupied and residential occupied. Those are fancy terms for “empty wheelchair” and “wheelchair that’s in use.”
Since we’re building a ramp for a senior to actually use, let’s assume we want “residential occupied.”
For a home ramp, a 2:12 slope or 9.5° of incline will suffice which means 12″ of ramp for every 2″ of vertical rise.
However, the Americans with Disabilities Act (ADA) recommends a 1:12 slope or 5° of incline if the ramp is to be installed on a commercial property.
What this means is you will need 12″ of ramp length.
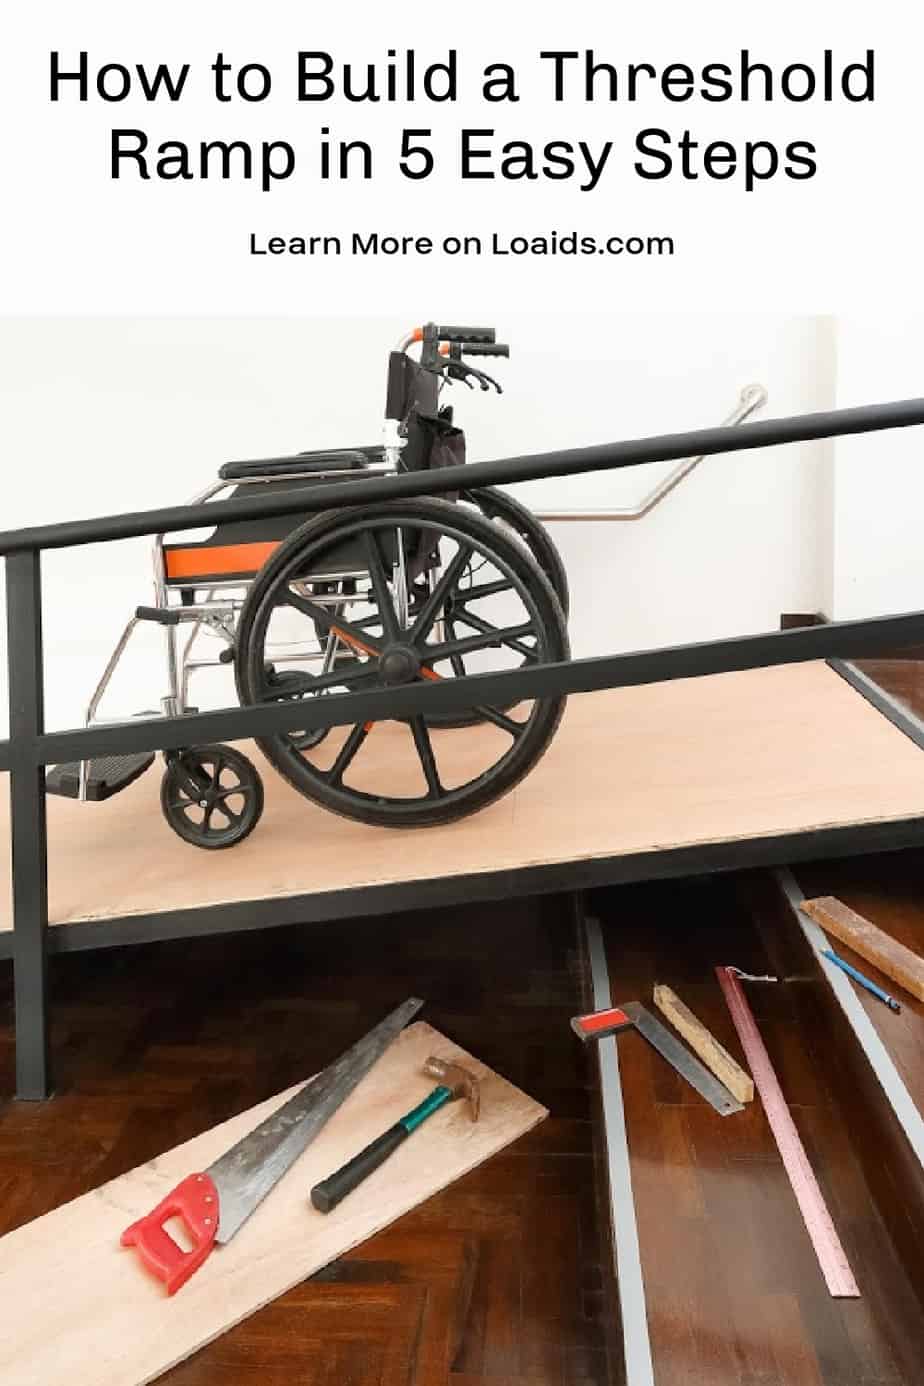
Step-by-Step Guide for Making DIY Threshold Ramp
There are so many front door ramp ideas that you can borrow from when you are making your threshold ramp including making a concrete ramp.
We are, however, going to concentrate more on how to make a simple wood threshold ramp for a senior or wheelchair user in these step-by-step instructions
Step #1 Prepare your materials
When making a ramp for thresholds, the first step is to assemble your materials and place them where they are easily accessible.
This includes a threshold ramp wood, a hammer, a saw, an electric drill, measuring tape, wood glue, and wood finish.
Step #2 Plan out where the ramp will be placed
If you are placing the ramp outside, you can use a marking spray to lay out the dimensions, and if you want one inside the house, you can use duct tape to ensure that you are not exposed to the marking spray fumes.
Another thing you need to do once you are sure where the ramp is going is to ensure that the area is clean as well as dust-free.
Step #3 Place a 2×8 on the door
You can either place it on the back or front door but make sure that it is securely screwed in.
After that, you can cut a tapered bevel of 45 degrees into 2×6-inch pieces before screwing them into your 2×8 on each side so that two wood pieces are coming out from the sides.
For maximum stability and to avoid slipping incidences, make sure that you secure them tightly using screws.
Step #4 Cut your 2×4 hardwood
Go ahead and cut two hardwood boards at an angle of 45 degrees before screwing them to the inside of the 2×8 you had placed on the door earlier.
Just like with the 2×6-inch pieces, make sure that these are also tightly secured to the boards.
Step #5 Finish up and test the ramp
The final step involves placing 36-inch deck boards on the already screwed-on boards.
The boards will act as the walkway, so make sure that you screw the plywood sides tightly.
Once you are done, test the ramp by going over it several times until you are sure that it can withstand the weight.
The last thing you want is the ramp coming apart when it is being used because then you risk serious injuries on the person.
READ MORE: How to Get the Wheelchair Ramps for Homes Free?
How to Build a Small Ramp for Wheelchair
If you are a disabled person who would want to learn how to build a small ramp for a wheelchair, or you want to help someone from your family with mobility, keep on reading the following paragraphs.
The good news is, that wheelchair ramps are much more common today than they were 20 years ago.
Persons with disabilities try their hardest to be as independent as possible. That is why they try to be on their own.
We want to stress out the Americans with Disabilities Act of 1990 (ADA), which mentioned wheelchair and handicap ramps in the way we know them today.
The act prohibits discrimination against people with disabilities while they are managing their everyday activities.
Thanks to it, public buildings built ramps that make them more accessible.
Properly constructed wheelchair ramps enable safe access to places that wouldn’t be accessible otherwise.
Here you have two options – to build or buy a ramp.
We will explain to you how you should build it, as it is the harder part obviously.
A wheelchair ramp should fulfill the following requirements:
- It should be wide enough,
- Sturdy enough to bear the weight of a disabled person and a wheelchair,
- Make a slope that makes it easy to navigate a wheelchair.
Note that a recommendable slope ratio is 1:16 or 1:20.

ADA ensures the following stipulations of the wheelchair ramps:
- 36 inches is the minimum width of a wheelchair ramp,
- Install the edge protection to prevent slipping off it,
- Steeper ramps require handrails.
If you are wondering which material is the best for building a wheelchair ramp, we have a couple of suggestions. (source)
Wheelchair ramps are usually made of wood, as this is an inexpensive, yet efficient solution.
However, count on the fact that wheelchair ramps made of wood need some maintenance.
For example, you would need additional non-slip protection.
Concrete is a more expensive material, but it is a great choice for people who are searching for a permanent solution.
Steel is also a good solution, but it is prone to corrosion.

Aluminum doesn’t corrode, is strong, and is the most expensive solution, as it needs slipping protection too.
The material that you would pick for your ramp defines the procedure of building it.
We will show you how to build a wooden ramp, as it is the most common solution and universal example.
- Build the ramp in sections. Start with the landing section and then attach the other sections one by one. It would be great to use concrete anchor bolts for the first section.
- Further, provide support to it by installing support posts.
- Continue with the post-installation until you reach the last section.
- You should make sure that your last section finishes with a beveled transition.
- This transition is important when the wheelchair comes off the ramp and reaches the surface. It also neutralizes the possible bump while coming off the ramp.
Extra Tips on How to Build a Small Ramp for a Wheelchair
Check out this guide if you just want to build something very small and temporary.
- Use 2-by-6 lumber frameworks for electric wheelchairs, as they are pretty heavy,
- Screws are better than nails,
- Treat the wood with a varnish or sealer to prevent rot.
You should check if the ramp meets the ground.
Secure the level landing, or construct it to be a part of the ramp.
Bear in mind the stress on the motor of a power wheelchair, as it should be able to overcome possible steep surfaces.
What Are the Benefits of Installing a Wheelchair Ramp?

1. Minimize the risk of injuries
Disabled persons and the elderly would feel more comfortable going to a grocery store or any other place.
A wheelchair ramp would minimize the risk of injuries, as the ramp would help them move with more confidence.
It provides support and gives them confidence.
Luckily, portable wheelchair ramps make it possible to move easier not only in the comfort of your home and garden but everywhere you go actually.
Wheelchair ramps increase mobility.
2. You can pick the material that suits your needs the most
As we mentioned above, people make wheelchair ramps out of many materials, such as wood, aluminum, concrete, etc.
You can even create a design that complements the design of your home and turn it into an interesting outdoor deck detail.
3. They are easy to install
You’ve seen the steps to a wheelchair ramp in front of your house.
Things are pretty simple here.
You can also turn permanent into portable wheelchair ramps.
All you have to do is divide it into sections and carry them in your trunk wherever you go.
4. Multifunctionality
The main purpose of the wheelchair ramp is to improve the mobility of a disabled or elderly person.
However, you can also save time and effort by using a wheelchair ramp.
If you have some furnishing, groceries, and equipment to transport, you can easily do the job with the help of the ramp.
5. Resale value
If you would want to sell your house at some point in time, you can resale the value you invested in building the ramp.
Families with disabled or elder members would surely consider buying your house, as it is already adjusted to persons with special needs.
Also, people using afo for foot drop or even rollator walker can get easier access to your home by using wheelchair ramp.
FAQ
How do you build handicapped walker steps?
To build handicap walker steps, you need to ensure the risers are a maximum of 4 inches tall. They also should be much deeper than normal, with treads of around 22 inches. The total depth will depend on the number of steps, the user, and any local regulations. It is also important to include handrails (grab bars) to provide another level of safety.
Wheelchair users and elderly people who suffer from mobility issues need help getting around the house and outside. A threshold ramp is a great addition to any home, making navigation easy.
While you can buy a portable wheelchair ramp made of aluminum or rubber, it’s not really difficult to make your own.
Have you ever made a threshold ramp for your home? Share your tips below!


Awesome, I will keep this in mind if this is ever needed! It’s a good skill to have.
Having the right slope and width is critical for safety and to allow those with limited mobility the freedom of accessibility they need. I would be too nervous to build one myself.
As a wife and mom, I appreciate practical DIY projects that can enhance accessibility and safety around the house.
We had a wheelchair ramp for my grandmother when she lived at our house. It is good to know what works best.
Building a ramp is a very appreciated thing. But we need to do it in the right way!
That’s a lot of different types of wheelchair ramps, seems like there should be no reason any place isn’t accessible!
Your guide on building a small ramp for someone in a wheelchair is incredibly helpful and practical. The step-by-step instructions and clear illustrations make it easy to follow along. Thank you for providing such valuable information and making accessibility a priority.
This is great information that I will keep in mind. thanks for sharing it.
This post is just perfect and such great tips for anyone that needs a wheelchair ramp. My father in law can use something like this and my husband will be the one ti build it so I am bookmarking this! Thanks for sharing!
This is super useful for those looking to build a ramp. I’m sure one day I’ll have to build a ramp on my porch.
Great post. I love that the small ramp doesn’t take up all the walk area. Very important.
We had to have a wheelchair ramp at our home many years ago. We had to have a contractor put it in. It is good to be able to build it on your own if you can.
So much useful info. This will help with building on for my home.
I think there should be wheelchair ramps everywhere. They are important!
This is a great post and I’m so glad you shared this DIY build a wheelchair ramp. I know someone who seeking to add a ramp to their home, I’m going to share this post with her.
This tutorial is a game-changer for creating inclusivity. Your step-by-step guide makes building a wheelchair ramp seem achievable and empowers us to make a tangible difference. Thanks for sharing your expertise
Great idea! My aunt is very sick right now and she uses a wheelchair. A small ramp will surely be of good help. It will also prevent back pain to caregivers.
Thanks! 🤗
Great idea here. Wheelchair ramps improve home accessibility!
Thank you for this very detailed breakdown of how to safely build a ramp. One of my best friends is in a chair and while her husband often carries her in her chair, I would love to one day properly welcome her with a ramp up my stoop.
This is very helpful. Safely building a ramp is ideal for those who needs access to it. Thank you.
I almost made a ramp for our 18-year-old cat when he was very weak…but he was ok when I would pick him up and lay him on the bed, so I kind of become more than a butler during his last days. <3
I’m sure one day I’ll have to have a wheel chair ramp built for my house. I’ll have to pay someone to build it though.