Skip to content
If you are looking for the best posture exercises for seniors, I’ve got you covered!
As a certified Doctor, I’ve found the top 6 ones – from child’s pose to the magical spinal rotations – I’ve used on my patients to boost their health and improve their postures for good!
In this article, I’ll share cutting-edge research on the best posture exercises and how they keep your back (plus the entire skeletal and muscular system!) healthier…
Keep reading to learn about the 6 best posture exercises to boost your health and overall well-being!
Table of Contents
Key Takeaways
- Exercises such as Child’s Pose, Cat-Cow Pose, and Spine Rotation can significantly improve spinal health and flexibility.
- Staying active improves physical health and independence, enabling seniors to perform daily tasks more comfortably.
6 Easy Posture Exercises for Seniors For Health & Vitality
Here are 6 simple postural exercises for seniors to achieve optimal health and alignment!
1. Child’s Pose
The child’s pose is a familiar yoga pose. It is performed in between complex poses as a resting position. Balasana
As Andrew Weil, M.D., aptly stated, ‘The Child’s Pose, as the name suggests, can help you release the tension and cares of adult life. I use it to relax and regain my composure between yoga poses.’ [1]
This pose is one of the best yoga exercises for seniors. It stretches the thighs, hips, and ankles and reduces fatigue and stress on the muscles.
The stretch is also a tremendous lumbar spine routine that relaxes the front muscles while stretching the back muscles.
The yoga pose is therapeutic, and when you perform it with the torso and head supported, it can help relieve neck and back pain.
How To Perform the Child’s Pose (8 Simple Steps)
- Start kneeling with your toes touching and then pull your hips back so that you are sitting on your heels.
- Spread the knees, making sure that your toes are still touching. If you have tight hips, you can keep your thighs and knees together.
- Lengthening your spine, sit up straight. Exhale and then dip the torso between the thighs.
- In this posture, the head and chest should rest between the thighs or, better still, on top. Bring your head down so that your forehead touches the floor.
- Your arms should be extended, and your palms should face down. While still seated on the heels, lengthen your spine from the hips, extending it further using your fingertips.
- Allow your upper back to broaden before softening and relaxing the lower back. Keep your head down, ensuring you are breathing deeply into the waist and back of the rib cage.
- Hold the position for about 5 minutes, ensuring you are breathing deeply in the process.
- Using your hand, walk the torso upright until you sit back straight on the heels to release the yoga pose.
Join DoctorJo as she teaches you the magic of the child’s pose!
2. The Cat-Cow Pose
The cat-cow pose is a typical yoga posture that targets your back and is excellent for shoulder training.
This posture exercise for seniors is ideal for correcting or avoiding bad posture, making it essential for maintaining mobility and independence.
It enhances balance, making it highly recommended for seniors experiencing back pain.
The pose combines two poses – the cat and cow- that help warm the body while improving spine flexibility.
When done correctly, it stretches the neck and back muscles while strengthening the abdominal organs.
The synchronized breathing movement is mind-calming and helps relieve stress in the long run.
Word of caution – Avoid this exercise routine if you have a neck injury. If not, ensure your neck remains aligned with your torso rather than dropping it back and forth.
How To Perform the Cat-Cow Pose (8 Easy Steps)
- Begin in a table pose on your knees and hands, ensuring that the wrists rest directly under the shoulders and that the spine is in a neutral position.
- Keep the back as flat as possible, engage your abs and core muscles, and inhale deeply.
- As you exhale, round the spine by pulling the belly button towards the spine, ensuring you are engaging the abs.
- Tuck the chin towards the chest and release your neck to assume the cat pose.
- Inhale and then arch the back, relaxing the belly and letting go.
- Lift the tailbone and the head towards the ceiling, ensuring that you are doing it naturally and that there is no unnecessary strain on the neck to do the cow pose.
- Continue alternating between the cat and cow pose, connecting your breath to every movement you make. Inhale when you do the cow pose and exhale when you assume the cat pose.
- Do at least 20 repetitions until you feel your spine warming up. To release the pose, sit back on the heels to keep the torso upright.
Here’s a quick video demonstrating these steps (in a heartbeat!)…
3. Standing Forward Fold Pose
This is one of the best balance and posture exercises for seniors that targets the glutes, hamstrings, and most importantly, the spine to correct and prevent faulty posture.
It targets tension in your back, shoulders, and neck and calms you down (plus it improves your nervous system in many ways).
This pose stretches and rejuvenates the entire body while preparing the body for more profound and intense poses. When done correctly, the pose is a low back and hamstring stretch.
When doing it, the pose should be comfortable and relaxing but ensure that you don’t push yourself too hard to end up doing more harm to your body than good.
The more relaxed you are during the routine, the deeper the stretch will be. Ideally, the stretch also helps stretch the legs and the hips, especially if your hips are too tight.
You will feel the whole backside lengthening and opening up when stretching.
How To Perform the Standing Foward-Fold Pose (11 Easy Steps)
- Begin standing with your back straight, toes touching, heels apart, and hands on the hips. Exhale and bend forward using your hips so the front of the torso lengthens.
- Bend your hands at the elbows and hold the left elbow with the right hand and vice versa.
- Drop your head and let it hang naturally, and then press the heels to the ground making sure that the sit bone faces towards the ceiling.
- Next, turn your thigh tops inwards, ensuring your knees don’t lock.
- Keeping the torso lengthened and the knees straight, place the fingertips or palms beside the feet.
- Bring the fingertips to align with the toes and press the palms on the floor.
- You can place your palms on the back of your ankles more flexibly.
- In that position, ensure you engage the quadriceps and bring them toward the ceiling. The more your thigh muscles are engaged, the more release you will feel in your hamstrings.
- Transfer the weight to the feet’ balls, ensuring the hips remain aligned over the ankles.
- Lengthen and lift the torso slightly as you inhale and exhale, releasing deeper into the stretch. Make sure your head is hanging.
- Remain in that position for about a minute and do five to ten repetitions before you release the pose.
Are you struggling with this pose? First, gulp up all the info in this video (and you’ll be a pro in no time!).
Moving on from the balance-boosting Forward Fold Pose, let’s focus on a gentle stretch targeting your shoulder and chest muscles.
4. Standing Chest Opener
My next posture exercise for seniors, the Standing Chest Opener, primarily focuses on lengthening your shoulder and chest muscles…
When done correctly, you should feel a stretch on the shoulder blade, chest, hip, and spine that isn’t too deep.
It is an excellent stretch for the postural muscles, and you should gradually notice changes in how your spine, hips, and shoulders react to even deeper times.
How To Perform the Standing Chest Opener (6 Easy Steps)
- Start standing with the feet comprehensive as far as the hips can widen. Raise the arms to the height of the shoulders and then spin the hands so that the thumbs face the floor.
- Exhale and then drip the arms behind the hips. Clasp the hands together or use a yoga strap.
- Lift the arms slowly away from the hips, keep them behind the back, and then push the chest forward while pulling the shoulders down. Hold that position for about 30 seconds.
- With your feet hip-width apart, stand, interlace your hands behind your back, and squeeze the shoulder blades until you feel your chest stretching.
- With your legs straight, bend at your hips, tuck in the chin, and bring your hands over the head.
- Hold for about 30 seconds. If you experience neck, back, or shoulder pain when doing the pose, ease out to prevent further injury.
Hypnotized by the standing chest opener? It’s pretty easy once you know how…
Let’s move on to my other all-time favorite: the downward dog yoga pose…
5. Downward Dog Yoga Pose
Did you know the Downward Dog Yoga Pose is famous and an excellent exercise for senior citizens?
“This is a great pose for strengthening the spine, core, torso, shoulders, arms, and legs,” writes Susan Cunningham, RN, a yoga instructor and an oncology nurse [4].
The downward dog is a typical yoga pose that involves a forward bend. It is mainly incorporated into exercise routines as a resting pose meant to balance the body.
When done right, the stretch can help relieve back discomfort and pain. It also helps align and strengthen the back muscles.
If you incorporate the stretch into your exercise routine a couple of times a week, in the long run, it can help in strength training while helping improve stooped posture associated with old age.
How To Perform the Dog Yoga Pose (3 Simple Steps!)
- Lie on your stomach and press into the hands while tucking the toes under the feet. In that position, lift the heels, hips, and knees and bring the sit bones towards the ceiling.
- Bending the knees slightly, lengthen the spine, ensuring the ears are aligned to the upper arms before tucking the chin towards the chest.
- Pressing firmly into the hands and lifting the heels slightly, hold the pose for about a minute. Do 5 to 10 repetitions.
Why all the hype about this pose? Let me tell you: it’s the boss…
Dr. Prem Jagyasi and Team (C) say it
“helps your body develop a better immune system, maintain digestion and blood flow, and ensure a tranquil mind. [3]“
As you can see – and, perhaps, what’s painfully evident by now – this pose is an absolute must for any yoga fanatic and a great pose to add to your yoga repertoire.
Want more tips? Head over to this video and turn your inner mystic up a notch!
6. Spine Rotation
Finally, let’s finish with a powerful back straightening exercise for seniors – the Spine Rotation!
If you are looking for excellent back straightening exercises, the thoracic spine rotator is one of the best. It targets the back to relieve pain and tightness to achieve proper posture.
At the same time, when done correctly, it can help improve mobility and stability and give you more independence as you grow older.
How To Perform the Spine Rotation (6 Effortless Steps)
- Start on all fours and then push the hips towards the heels such that they are resting on the shins.
- Placing the left hand behind the head, extend the elbow to the side of the body. Make sure that the right-hand stays under the shoulder.
- If you can’t do that, you can also bring it to rest on the forearm or towards the center.
- Exhale and then rotate the left elbow towards the ceiling, ensuring you stretch the torso as you do that.
- While in that position, inhale and exhale deeply, then release the pose and return to the starting position.
- Do five to ten repetitions and then repeat on the other side.
Want a nutshell summary? Here’s a comparison table showing all the basics!
| Exercise | Description |
|---|---|
| 1. Child’s Pose (Balasana) | A relaxing pose that stretches thighs, hips, and ankles and reduces muscle stress. Excellent for spinal flexibility. |
| 2. Cat-Cow Pose | A pair of poses that warms the body, improving spine flexibility. It enhances balance and is good for back pain relief. |
| 3. Standing Forward Fold Pose | Targets glutes, hamstrings, and spine. Great for stress relief and nervous system improvement. |
| 4. Standing Chest Opener | Focuses on lengthening shoulder and chest muscles. Good for postural muscle development. |
| 5. Downward Dog Yoga Pose | Strengthens the spine, core, torso, shoulders, arms, and legs. Good for the immune system and digestion. |
| 6. Spine Rotation | It targets the back, relieving pain and tightness. Improves mobility and stability. |
Let’s dive into six bonus tips to enhance your posture and overall health!
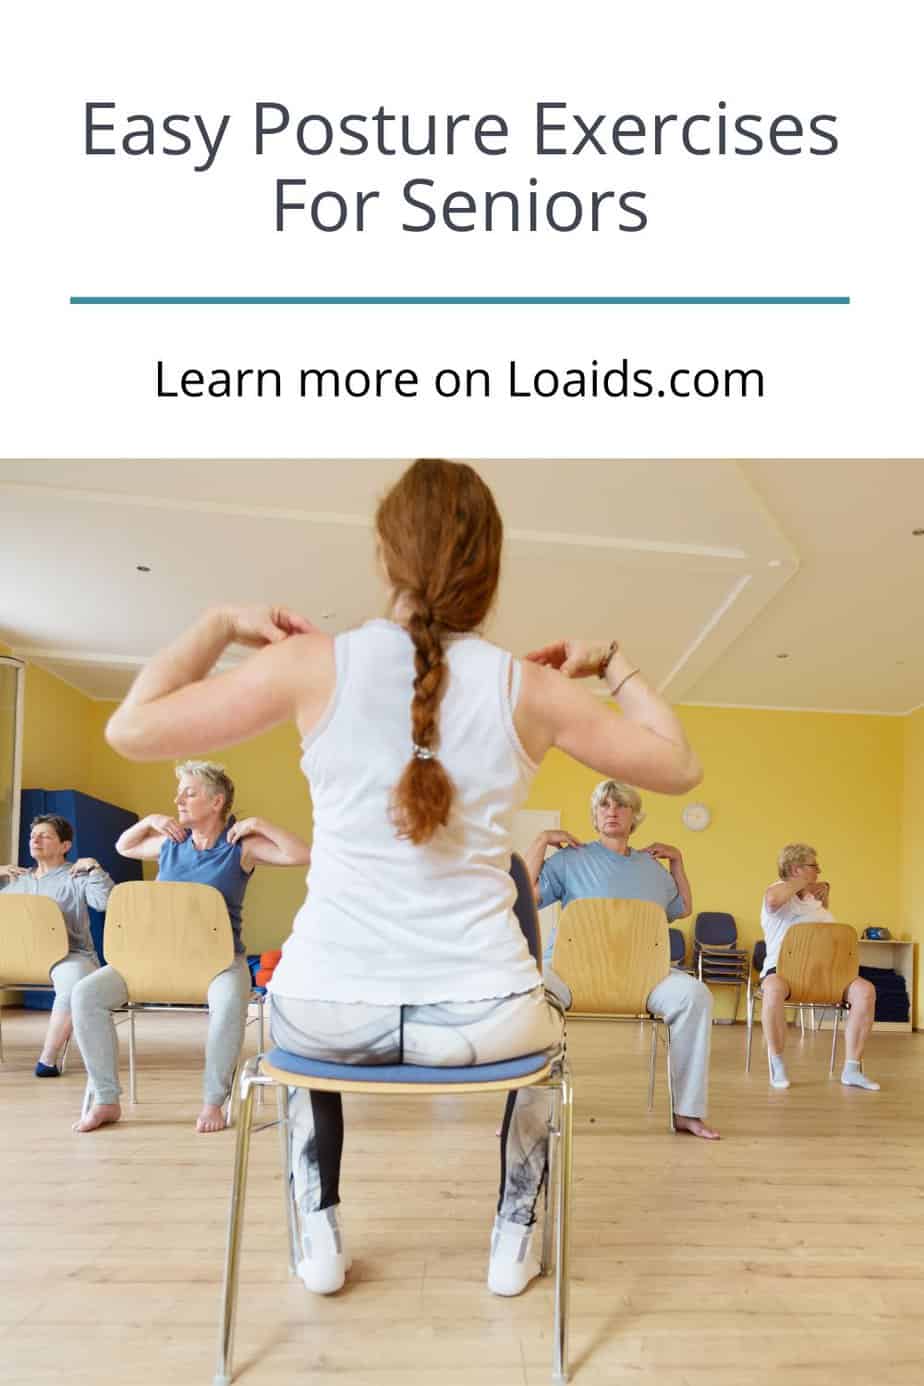
6 Bonus Tips to Further Improve Your Posture
Posture, an integral aspect of our health, is often overlooked until we experience discomforts, such as neck pain or shoulder strain.
However, proper posture is possible with awareness, exercise, and dedication. Here are some bonus tips based on my years of medical expertise and research:
1. Focus on Core Strength
Saloni Doshi, a Harvard-affiliated Brigham, and Women’s Hospital physical therapist, says,
“It’s not as hard as you may think [2].
“Better posture,” she chiefly stresses,
“it is often just a matter of changing your activities and strengthening your muscles.”
Your core muscles – including your abdominal and gluteal muscles – support maintaining an upright posture. It’s also essential to consider shoulder exercises for seniors and back stretches for the elderly, as these are crucial for overall posture and mobility.
Incorporating exercises, like planks, bridges, and the aforementioned shoulder exercises and back stretches, into your fitness program will bolster your core strength, benefiting your posture.”
2. Exercise with Resistance Bands
Resistance bands are an effective, low-cost tool to increase your range of motion and strengthen your postural muscles.
They’re handy for working your shoulder blades and improving the alignment of your body position.
3. Adopt a Neutral Position
Try to maintain a neutral position throughout the day, ensuring that your feet are flat on the ground when seated, your head posture is level, and your shoulders are relaxed.
This position reduces the strain on your neck muscles and spine.
4. Regular Posture Checks
Dr. Beth Frates, clinical assistant professor of physical medicine and rehabilitation at Harvard Medical School, says,
“It’s going to take active engagement, exercise, and strength training to improve posture and stay upright. [2]”
Self-awareness is key. Regular posture checks allow you to identify when slipping into poor posture habits, such as rounded shoulders or forward head posture.
If you spot these, make immediate posture corrections.
5. Consult a Physical Therapist
If you’re struggling with severe bad posture or experiencing chronic pain, I recommend seeking professional help.
A physical therapist can provide personalized guidance and specific exercises to address your needs.
6. Mindful Exercise
Remember to begin any exercise routine comfortably, focusing on your form and muscle memory.
It’s not about speed or repetitions but the quality of movement that will genuinely improve your posture.
Remember, a proper posture is an ongoing process contributing to a better quality of life.
Don’t be discouraged by setbacks; consistency is critical, and every slight improvement is a step in the right direction.
FAQs
1. What are the best exercises for posture correction for seniors?
Child’s Pose, Cat-Caw Pose, and Spine Rotation are particularly beneficial for seniors. They offer gentle yet effective stretching and strengthening of the spine and muscles supporting posture.
2. Can these exercises help with chronic back pain?
Absolutely! These exercises aim to strengthen the back muscles and improve spinal alignment, potentially relieving chronic back pain.
3. How often should seniors perform these exercises?
Ideally, incorporating these exercises into a daily or bi-weekly routine can provide significant benefits. The frequency may vary based on individual fitness levels and doctor’s advice.
Conclusion
Discovering posture exercises for seniors is like finding gold – pure bliss (but err on the side of caution!)
Keeping your body engaged through simple exercises is an excellent way to remain healthy and ensure you can do things for yourself.
To add, one area that needs care as you age is the back. We tend to lose muscle mass and flexibility as we get older, leading to back problems.
These back exercises for older adults can help improve flexibility and mobility, and they are not too intense or challenging to figure out.
So, beat poor posture with regular manageable exercises starting now! Just remember to check with your doctor first!
If you found these exercises helpful, please share this article with other seniors who might benefit – and don’t forget to leave a comment about how much you loved my poses…
References
1. Bulzoni S. Child’s Pose – Yoga With Dr. Weil [Internet]. DrWeil.com. 2013 [cited 2023 Jun 16]. Available from: https://www.drweil.com/health-wellness/balanced-living/exercise-fitness/childs-pose/
2. Godman H. Is it too late to save your posture? [Internet]. Harvard Health. 2019. Available from: https://www.health.harvard.edu/exercise-and-fitness/is-it-too-late-to-save-your-posture
3. Dr Prem Jagyasi and Team (C). Dr Prem Jagyasi and Team (C) [Internet]. Dr Prem. 2015. Available from: https://drprem.com/wellness/yoga-is-not-just-about-spirituality-it-is-more-about-health-and-wellbeing/
4. Cunningham S. Techniques to make yoga more enjoyable [Internet]. wexnermedical.osu.edu. 2018 [cited 2023 Jun 16]. Available from: https://wexnermedical.osu.edu/blog/techniques-to-make-yoga-more-enjoyable